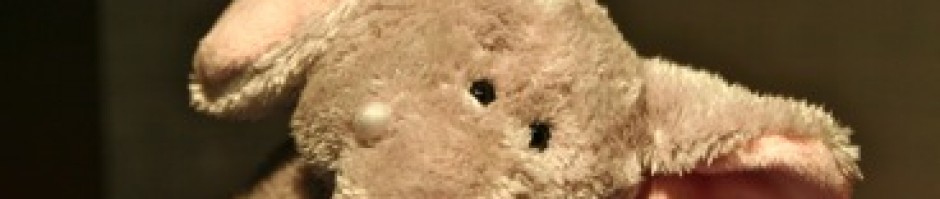
 We begin our workshop by examining a simple animatronic raccoon named Raffles. Raffles began life as a store-bought hand puppet. Inside, he has a place for your hand to work his mouth. If you are dexterous, you can also place a finger in each of his arms to manipulate them as well.
To turn Raffles into an animatronic figure, we built a simple actuated skeleton which works the puppet rather than your hand. Raffles is a 2-degree of freedom figure. That means he has two distinct motions that can be individually controlled. The first allows his mouth to move while he talks, and the second allows his head to tilt. This is more limited than what you could do with your hand, but it’s enough to be surprisingly expressive.
 The mouth mechanism has a single servo motor which pivots a J-shaped aluminum bar. This bar fits into Raffles upper lip. The lower lip is not actuated. It is held in position by another piece of aluminum attached to the servo body. If you look closely at Raffles, you’ll see that his eyes are on the top of his head. So he looks best when you are looking somewhat down at him. From this view, it would be hard to see if the lower jaw is moving. This is why we chose to actuate the upper jaw and it is pretty typical of the sorts of decisions you will be making as you design an animatronic figure.
A figure which only moves its mouth looks pretty stiff. So we decided to give Raffles one more degree of freedom – a head tilt. The servo motors rotate about an axis. An obvious choice would be to place this second servo so that the head would turn from left to right. But playing around with the puppet showed that this wasn’t very expressive. We also tried the other obvious choice – nodding the head. But this also seemed rather stiff. Instead, we decided to place the second servo at an angle, which gives a kind of combined nod and turn. This is surprisingly expressive. Of course, it would have been better to have both the head turn and nod separately, but that would have required two servos and a bit more effort.
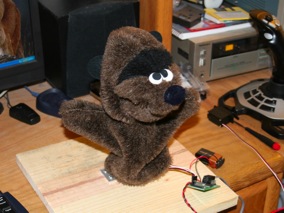
In order to tilt the head, we have to tilt the whole mouth mechanism. (It is part of the head, after all!) As can be seen in the pictures, the mouth mechanism is mounted on the head tilt servo, which is mounted to a stand. The puppet is then placed on top of this actuated skeleton.
In future sections, we’ll examine all of this in much more detail. But for now, we will move on to controlling our creation!
To control the two servo motors in Raffles, we will use a standard Windows-based PC running special animatronics control software. But before we can do that, we need a servo controller to connect the servo motors to the computer. There are many options, but for a small project like this, the Pololu Micro Maestro 6-Channel USB Servo Controller is a great choice.
In addition to the controller itself, you will need a power supply for the servos. There are two problems you face: choosing an appropriate supply, and physically connecting it to the board.
Standard hobby servos typically draw from 0.1-1 Amp of current depending on the load. (Digital servos can draw several times this!) Servos are typically rated for use at 4.8V to 6V. At the lower voltage, servos tend to run weaker and slower, but they also last longer. For our purposes, we will be running the servos at 5V. The main reason for this is that high current 5V power supplies are widely available, and relatively inexpensive. A 5V, 4A supply is good match for this controller. You can find one here.
Now that you have a supply, you need to connect it to the board. Unfortunately, with this board, that generally means you will have to solder a mating jack to the board, which depends on the particular power supply. It’s probably best to have someone knowledgable about electronics do this for you. It’s worth noting that the larger Pololu boards have wire terminals that make this a bit easier.
Next, we turn to creating the show itself.
Once Raffles is appropriately connected to the computer we are left with the problem of programming him. We use a software package called Visual Show Automation from Brookshire Software. VSA lets you set positions for each servo as a function of time. In addition, VSA lets you have a synchronized audio track. Keep in mind that VSA is both a system for designing the motions as well as playing them back.
To use VSA, we typically begin by making an audio recording of what we want Raffles to say. We then load this audio file into VSA and run WaveMotion analysis to automatically generate servo motion settings that following the volume of the audio track. This will control Raffle’s mouth so that it looks like he is speaking the audio track. Next, we use real time capture to create the motion track for Raffle’s head tilt. The way this works is that you control the head tilt with a joystick while the audio is playing (and the mouth is moving), and the software records this. If we had more servos, we could record each motion track, one at a time, using the joystick. You can also go back and edit the motions in fine detail once you understand how to use VSA.
Most of us don’t sound very much like raccoons, so a little processing on the voice file can do wonders. We use an audio editing package called Audacity. Audacity not only allows you to record your voice, it also lets you apply all sorts of interesting effects. Best of all, Audacity is open source software, and is freely available!
The key to making a nice raccoon voice is pitch shifting. If you take almost anyone’s voice and shift the pitch up 20-40% you’ll end up with something that sounds very raccoon-like. Audacity has a pitch shift function which changes the pitch without changing the speed of the recording. This allows you to record your normal voice, and then “raccoonize” it!
To see a short video of Raffles, click here.
That’s the quick overview of Raffles. Don’t worry if you didn’t follow everything. We will spend the rest of the workshop learning all the details!